
You may have noticed that the FAA recently updated the DroneZone website. Below is an updated guided walkthrough for registering and renewing your FAA registration on the updated site.
1. To Register:
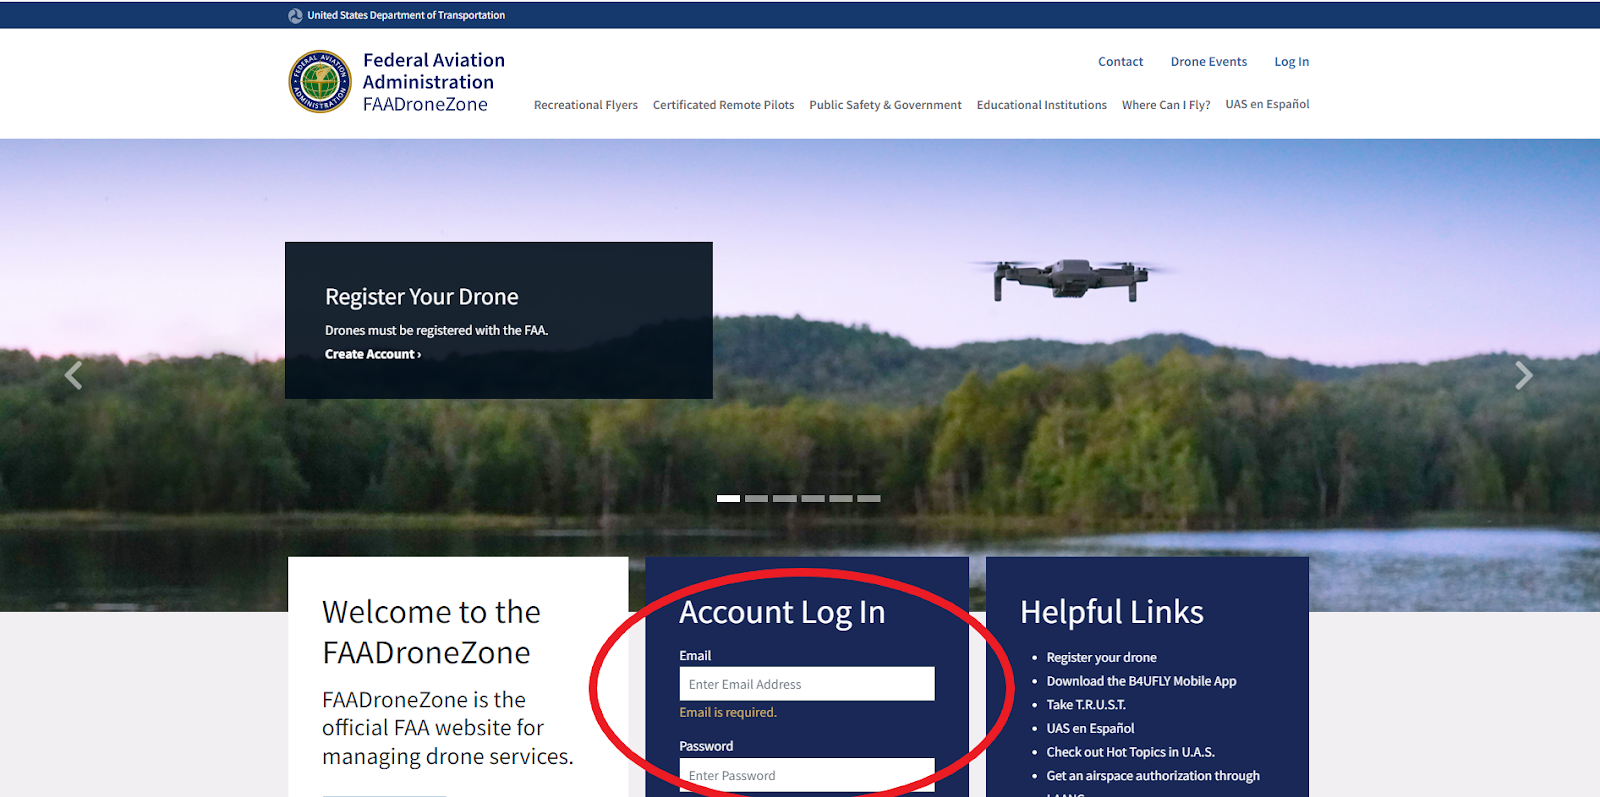
Go to faadronezone.faa.gov. When you are on the webpage, select the Create Your Account link in the box that says Register Your Drone.
Note: You do not need to register your aircraft if it is under .55 lbs (250 grams).

To Renew:
Go to faadronezone.faa.gov. When you are on the webpage, find the Account Log In box and enter your email and password. Once logged in, skip to step 6.
*Note: The FAA uses the term ‘drone’ to address all UAS, including model aircraft.
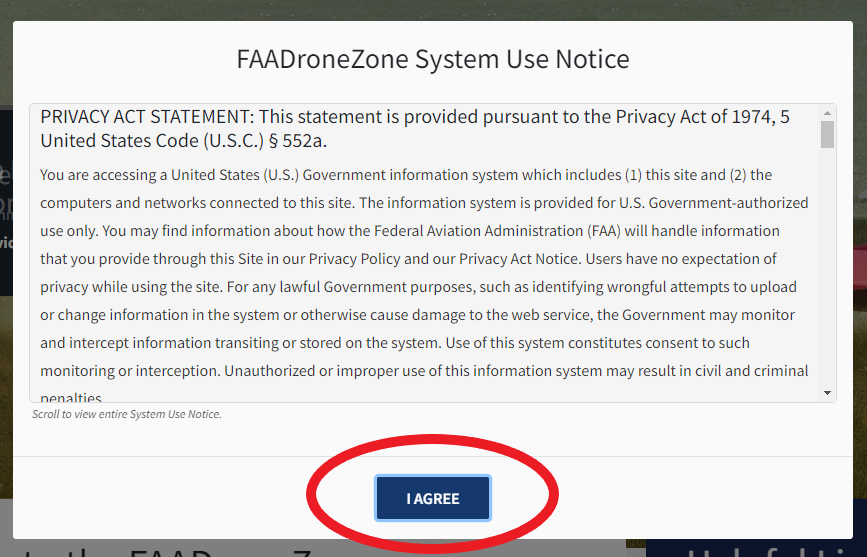
2. A box will pop up about an FAADroneZone System Use Notice. Click on the I Agree button.
3. You will be asked to create an account. Enter your information into the required boxes and select the Create Account button.

4. A verification email will be sent to the email account you entered. It will look similar to the image below. Click on the box that says Verify Account.
*Note: You may need to check your spam folder for the email.

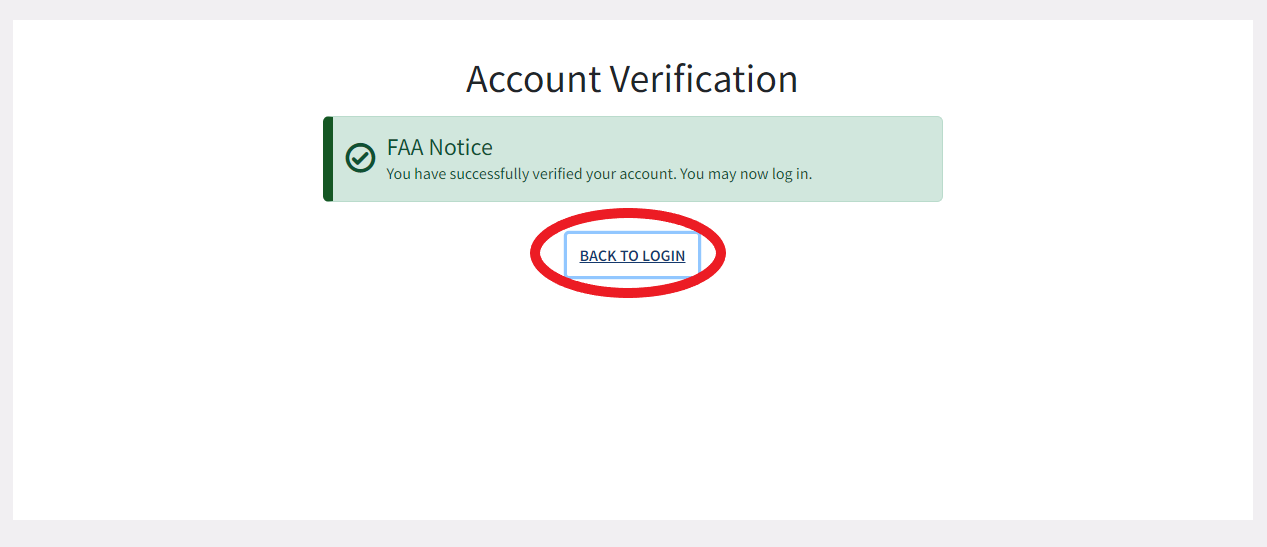
You will be brought back to the DroneZone. Your account is now verified. Click on Back to Login to login using the email address and password you just set up.
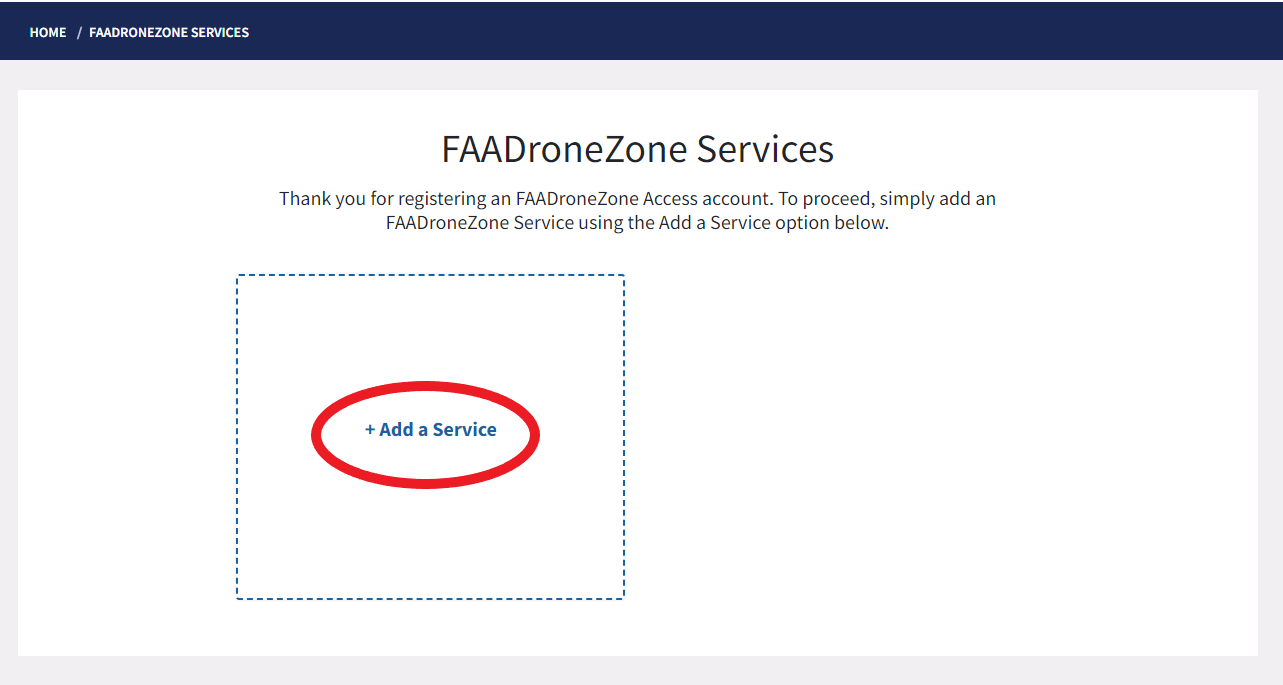
5. Once logged in, you will be brought to the FAADroneZone Services page. Click on the box that says + Add a Service.
A box will pop-up. Click on the Select Drone Owners and Pilots Service, and then click on the Add Service button.

6. Your screen should now look like the below image. Click on the Launch Drone Owners and Pilots Dashboard button to continue.

7. To Register:
You will now need to choose your Account Type. Select the Set Up Recreational Flyer Account button in the Recreational Flyer box.

To Renew:
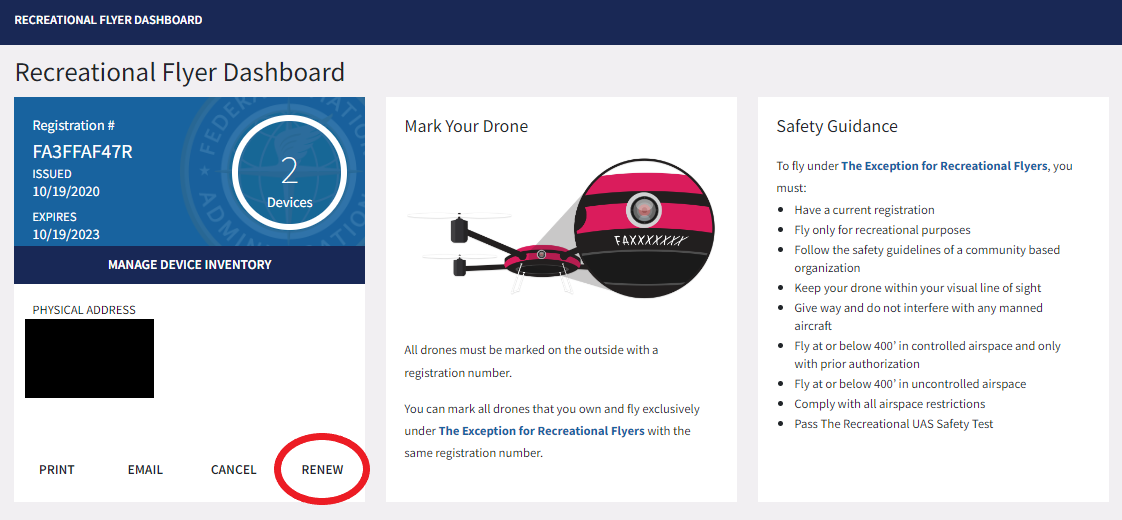
Your Recreational Flyer Dashboard will appear. Find and click on where it says Renew.
8. You will be brought to your Recreational Flyer Profile. Enter your information and then scroll down to select the Proceed to Checkout button.

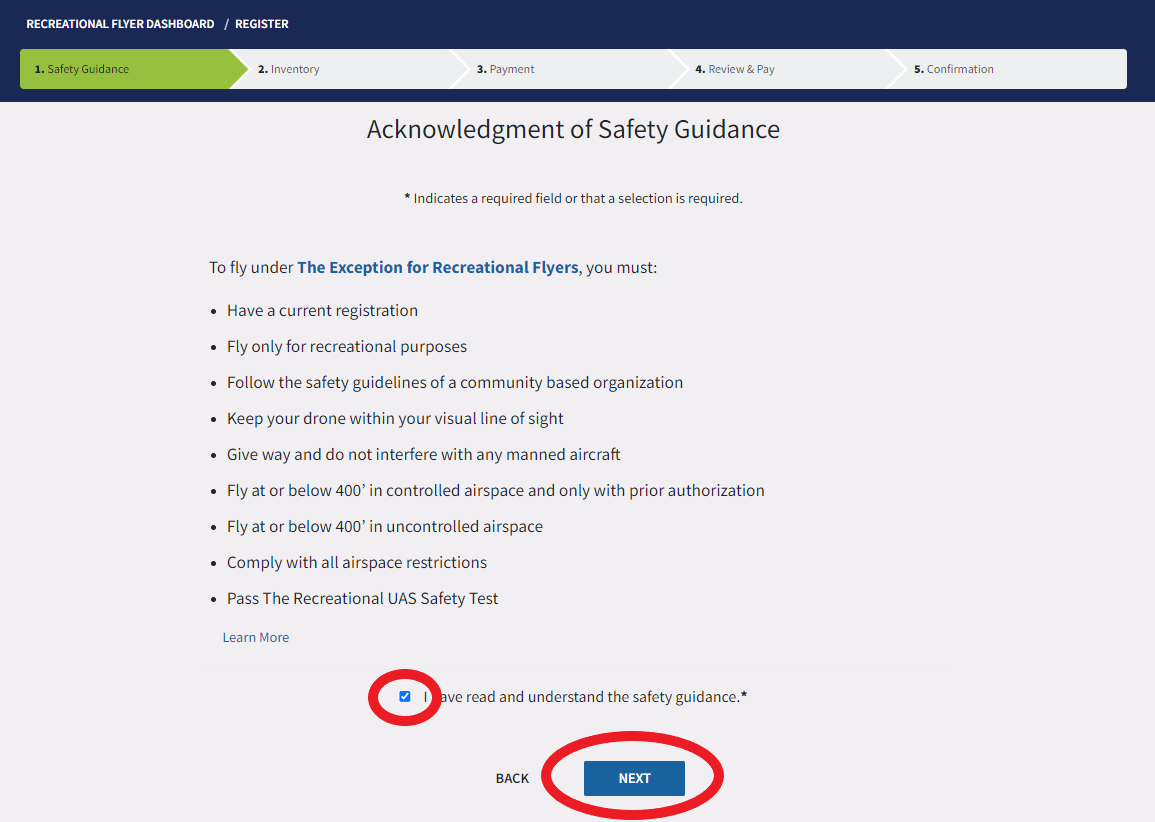
9. Next, you will be asked to accept the Recreational Flyer safety guidelines. Select the box indicating you have read and understand the safety guidelines, then select the Next button.
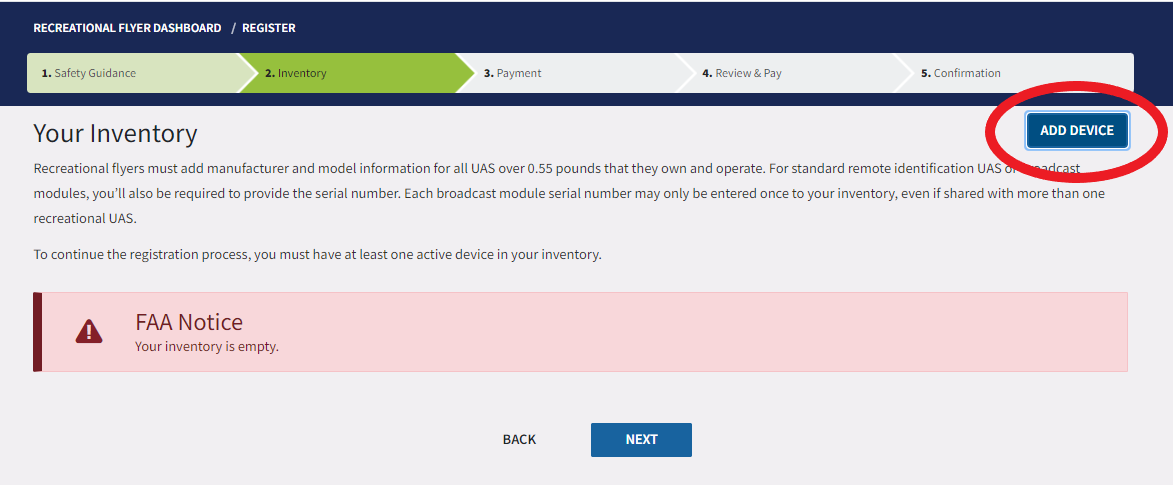
10. Then, you will need to add at least one device (model aircraft) to your inventory to continue. This is a new update to the registration process the FAA has added to be compliant with the upcoming Remote ID requirements. Select the Add Device button in the top right of the screen.
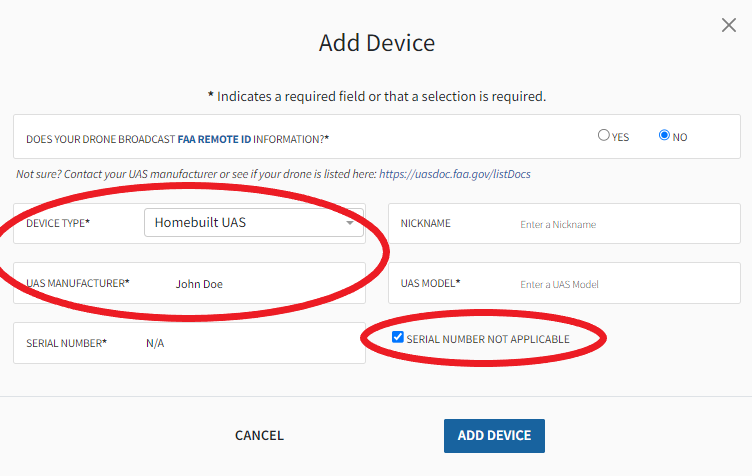
A pop-up will appear on your screen. If you are complying with Remote ID by flying at a FRIA approved site, in the box asking if your device is equipped with Remote ID capabilities, select No. If you are using a Remote ID module to comply, you will need to select Yes and enter the serial number of the module in the box asking for a serial number. (Remote ID is currently required but will not be enforced until March 16, 2024. For more information, click here.)
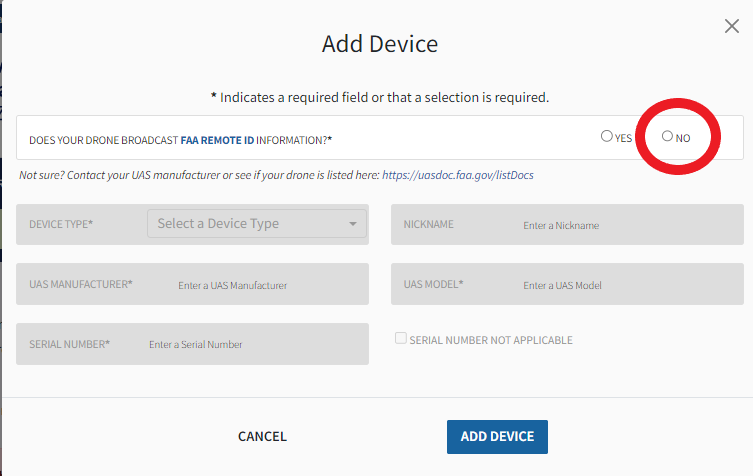
If you have an aircraft for which you know the manufacturer, select Traditional UAS and enter the manufacturer in the box labeled Manufacturer. For Serial Number, leave the box blank and select the box to the right that states Serial Number Not Applicable. (The serial number is for the Remote ID module, not the aircraft.)

If you don’t know the manufacturer or if you built your aircraft, select Homebuilt UAS. For Manufacturer, list yourself. For Serial Number, leave the box blank and select the box to the right that reads Serial Number Not Applicable
Next, the Nickname field is not required, but you can type anything in the box to help you identify which aircraft is which, especially if you have multiple aircraft. An example is below:

Then, enter the Model of your aircraft. An example is below:
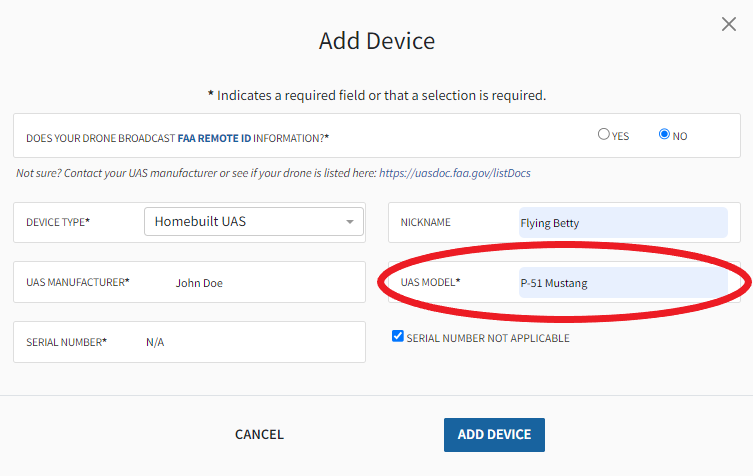
Finally, select the Add Device button.

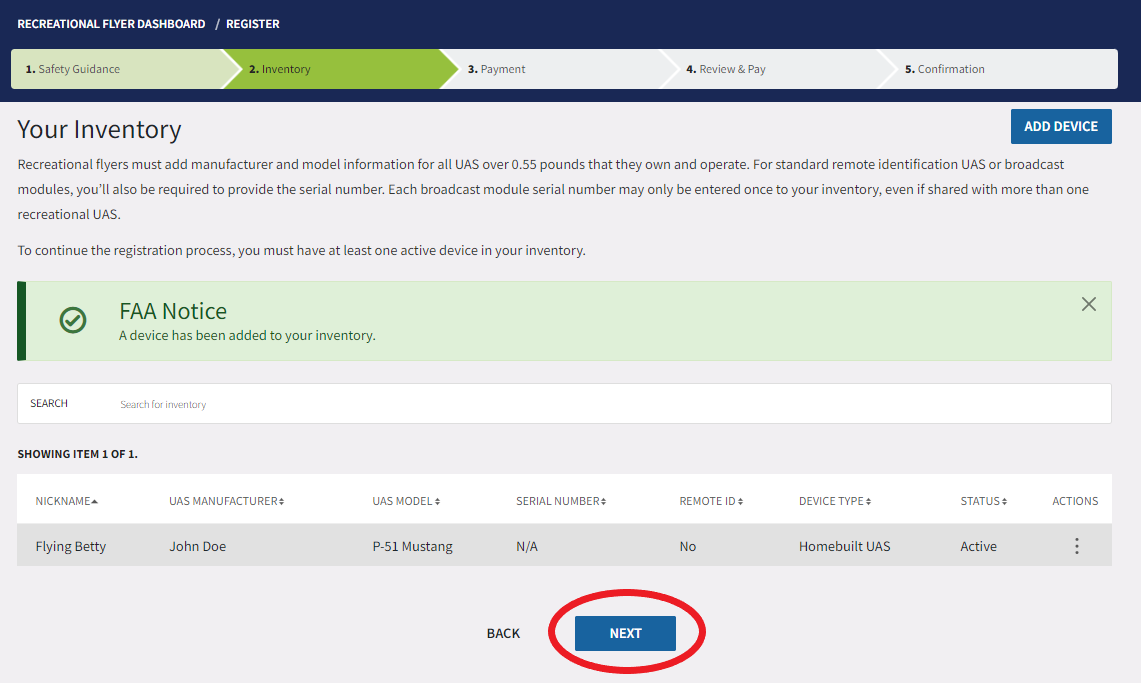
Your aircraft is now listed in your inventory. You can go through the process again and add as many devices as you would like, but this is not required at this time. There is no fee. Select the Next button to continue.
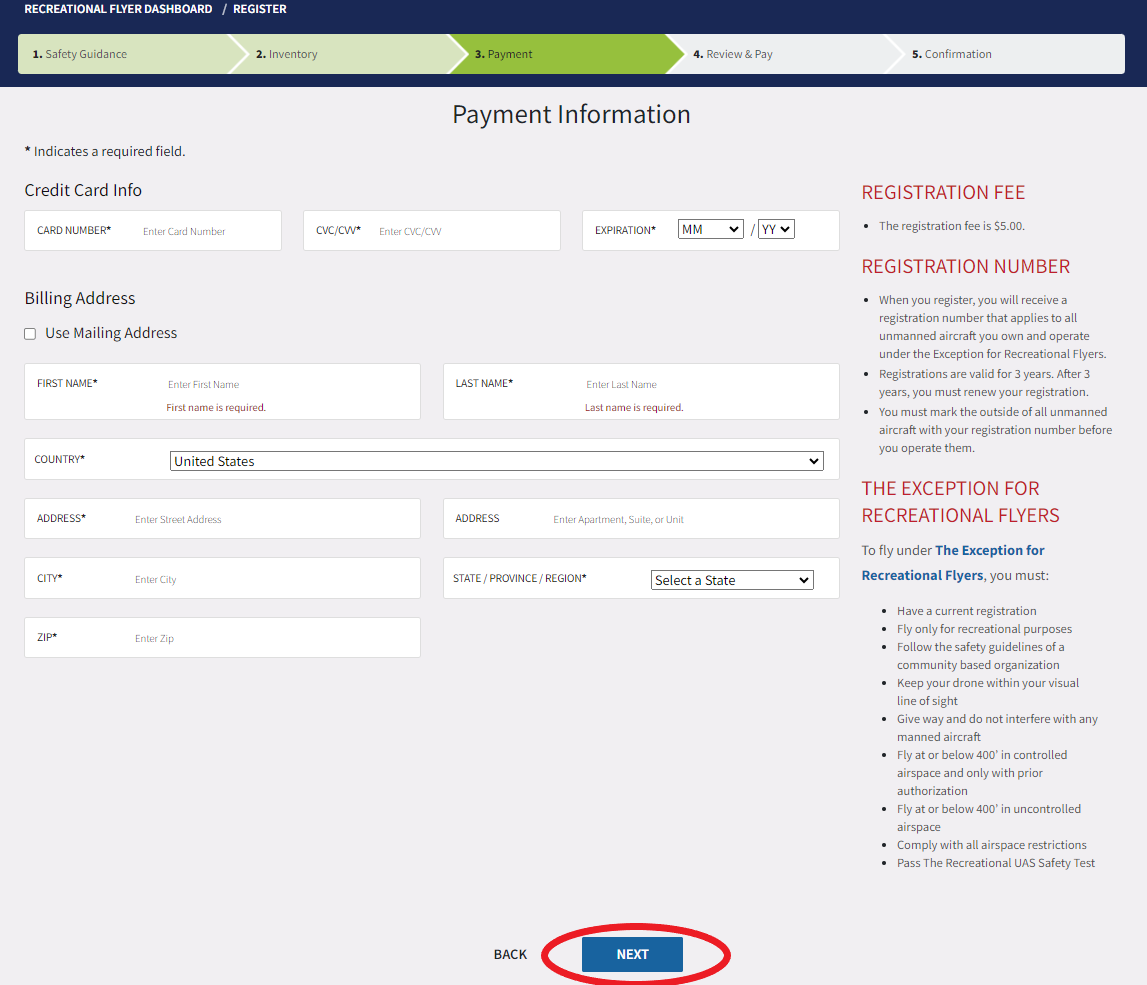
11. You will be asked to fill out your payment information. Enter your information and then select the Next button at the bottom of the screen.
12. Finally, you will be asked to review your information. Make sure you are only being charged $5.00. If you are being charged more, you are on a scam site. If all your information is correct, select the box stating you understand and then select the Pay button.

Your FAA registration number will appear on the next confirmation page. This number should be displayed on the outside of your aircraft. Your FAA registration is good for the next three years.
To remain current with the most recent government-related news, regularly visit the AMA Government Affairs blog.
If you have any further questions or concerns, contact the Government Affairs department at (765) 287-1256 or amagov@modelaircraft.org.